
One of the conclusions of our article entitled ‘Can PR Metrics Truly Measure Outcomes & Impacts?’ was that comms professionals need to look for data outside of PR in order to prove genuine ROI.
An example of this was to track sales leads via an organisation’s CRM. A ‘Lead’ is a prospect who has shown interest in a product or service. A source is where they first heard about it.
One of the most popular CRMs is Salesforce, so we thought it’d be handy to create a step by step guide for PRs looking to exploit this powerful platform.
Considerations:
– This pertains to Salesforce’s Lightning interface, not the Classic version
– It requires admin level access
– It obviously requires a willing sales team who are tracking lead sources (ie where leads came from) and inputting that into the CRM
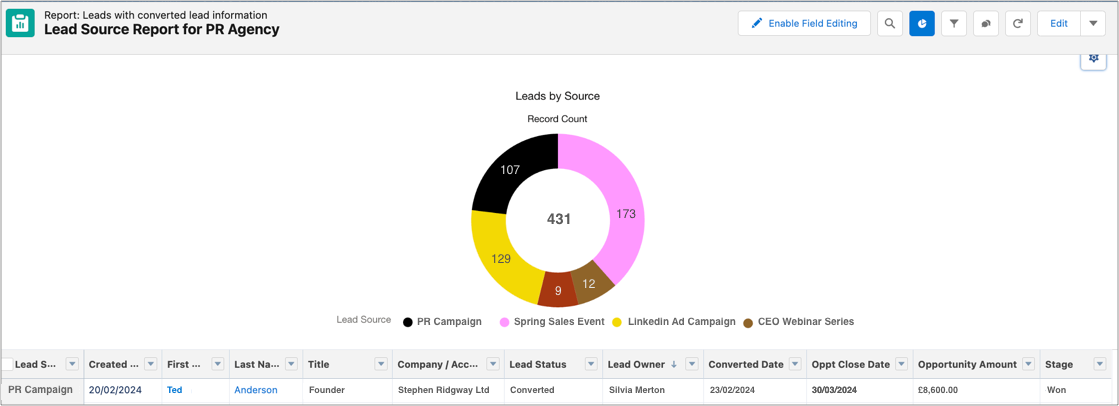
Here’s a snapshot of what we’re aiming for: a live report showing leads by source, where one of those sources is PR.
OK, let’s get going!
Stage 1: Adding a new ‘Lead Source’ for your PR campaign
The first step is to ensure the new lead source (e.g. ‘PR Campaign’) is available for selection within the CRM:
1.1 Click on ‘Setup’ in the header:

1.2 Search for ‘Object Manager’ in the sidebar:

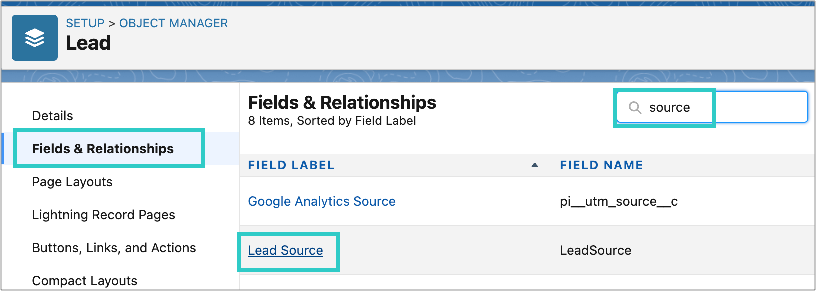
1.3 Search for lead and click on the ‘Lead’ result:

1.4 Find ‘Fields and Relationships in the left column, then search for and select ‘Lead Source’:
1.5 Click the ‘New’ button:
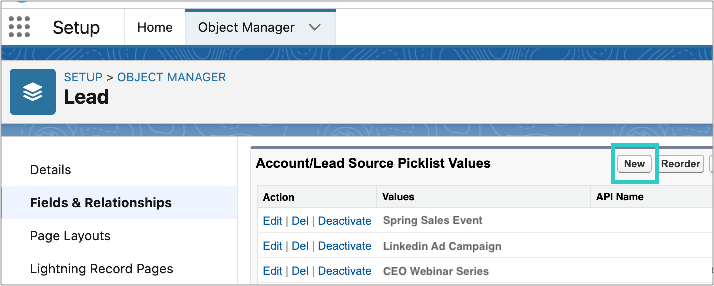
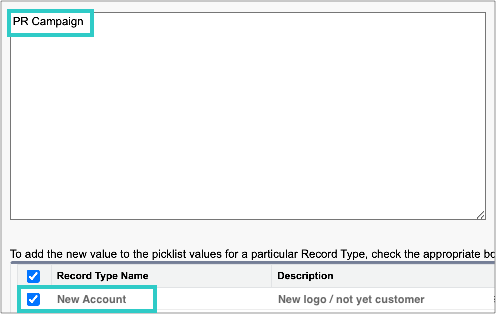
1.6 Add one or more Lead Sources, for example ‘PR Campaign’ and click the save button:
You can add as many sources as you like here: just enter a new line for each one.
Stage 2: Ensure the sales team is aware of the new Lead Source
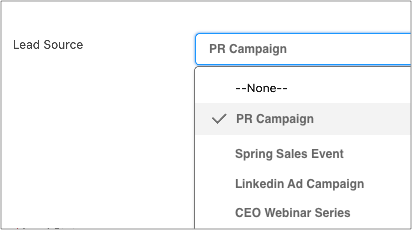
2.1 It’ll be visible when the Lead Source field is selected in the lead screen:
Stage 3: Create a live report that displays Leads by Source
3.1 Click on ‘Reports’ in the top navigation bar, then click ‘New Report’:

3.2 Search for and select ‘Leads with converted lead information’:
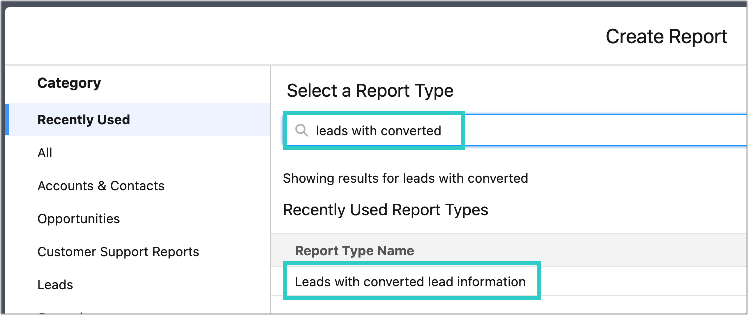
If it doesn’t display, make sure to select ‘All’ in the left column menu.
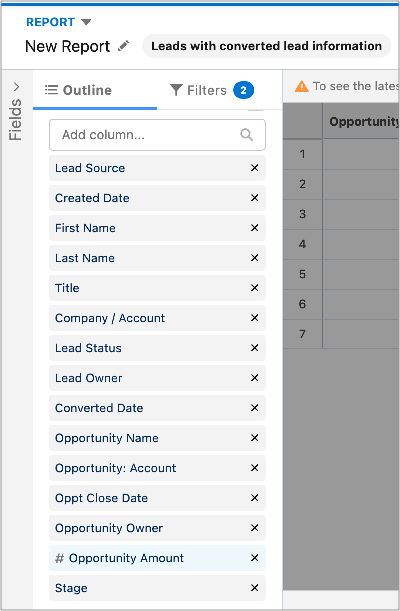
3.3 First, decide which fields you want to display in the report: you can search, delete and reorder. Here are some useful fields:
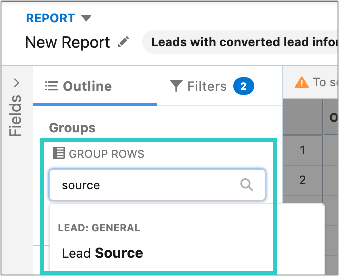
3.4 Now we want to group the rows by Lead Source. Scroll up the screen to the ‘Groups’ section. Search for and select ‘Lead Source’:
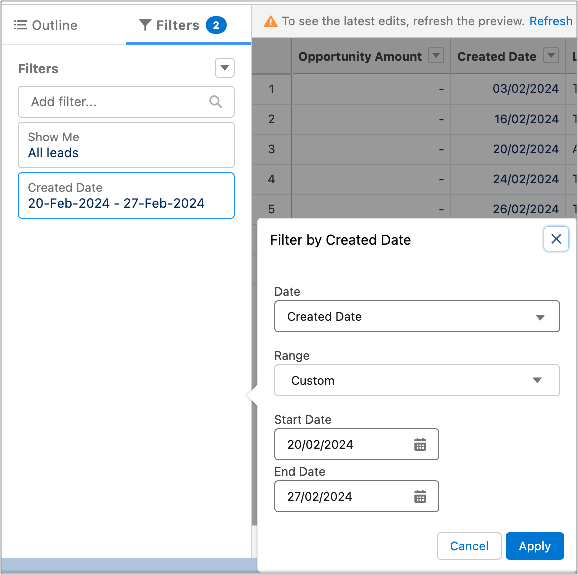
3.5 Now click on the Filters tab and select your parameters. For example, you may want to only show leads that were created during and just after the PR campaign took place. Click ‘Apply’ when happy:
3.6 ‘Save and Run’ the report:

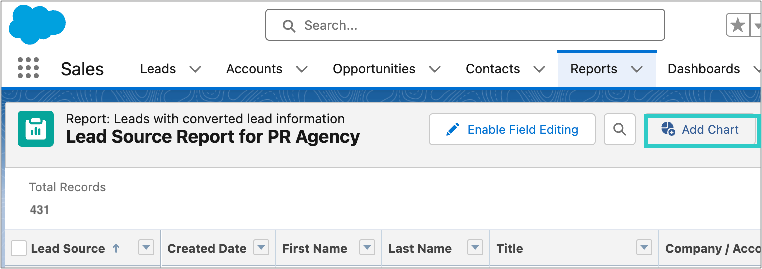
3.7 Now, let’s create a pie chart to display the different Lead Sources. Click ‘Add Chart’:
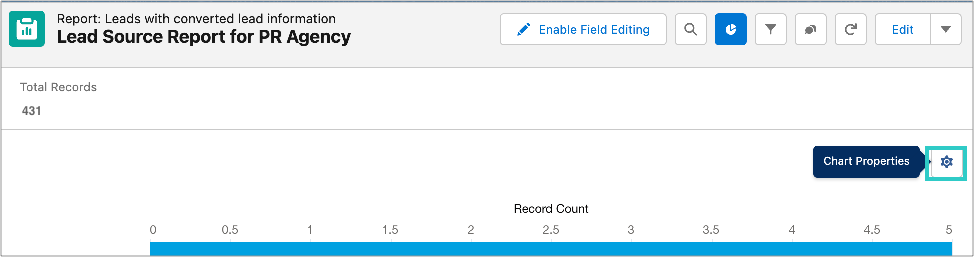
3.8 Then select the little cog icon:
3.9 We recommend the settings as shown below:

3.10 And voila!
You now have a live report displaying leads by source, with a data table showing which ones have ‘converted’ to deals and ultimately customers. The holy grail!
We hope this guide was helpful. If you have any questions about Salesforce for tracking PR, drop us a line at hello@releasd.com.